Inverting Negatives With film Q
User Guide
15 min read by Dmitri.Published on . Updated on .

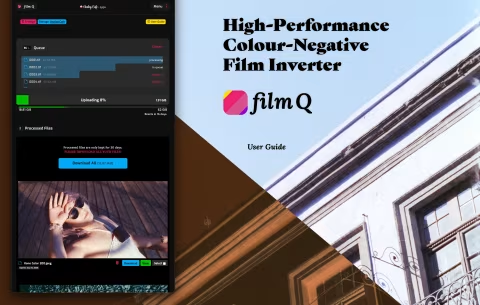
film Q is a simple yet powerful web app for inverting film negatives with full control over the process and results.
It works by deterministically reshaping the image data, while making no hidden changes to the colours, contrast, or saturation. You get everything your scanner or digital camera captured — in RAW, TIFF, HEIC, JPEG, and more — unfiltered.
film Q is free for all analog.mom GOLD members ($5/mo, includes more film photography apps + monthly special articles).
In this guide: How does it work? film Q *is great* for: film Q is *not great* for: File formats and sizes. How to prepare your film scans. How to download and manage your inverted files. How to share files between devices. How to use the Dropbox integration to archive your film scans. How to use the Watch Folders for live instant inversions. Adjusting view settings. Enabling TIFF output. How to colour-correct your film scans. How to automatically fix expired print and slide scans. How to install the analog.mom web app. Troubleshooting. Future updates. Contact. Support this blog & get premium features with GOLD memberships!
How does it work?
film Q has no exposure sliders, colour controls, or scanner simulations. It has just one button: “Invert.”
While other apps use proprietary algorithms that boost saturation, sharpen, and modify contrast of your scans, film Q inverts your negatives using this well-explained technique, creating unedited flat positives that you can further adjust in your favourite image editor (Photoshop, Affinity, GIMP, etc.).
film Q processes files in the cloud ☁️, privately and securely. This saves your computer’s resources and offers unparalleled compatibility. It works on Mac, iOS, Android, Windows, and Linux devices, as well as many vintage computers. All you need is a web browser.
Unlimited temporary storage keeps all your inverted files for 30 days and instantly syncs across all your devices.
You can also set up “watch” folders on your computer with an optional Dropbox integration. Adding negatives to those folders will automatically create inverted versions on all your connected devices. If you tether your digital camera to your “watch” folder, you’ll begin to see results soon after you click the shutter.
film Q *is great* for:
Mobile film scans. You can preview your freshly developed film or get decent results using tools like DigitaLIZA and a smartphone (with HEIC support).
Film scans in RAW format. film Q can read and use a wide variety of formats, including RAW files produced by modern digital cameras. It uses a 16-bit uncompressed image pipeline to deliver high-quality results.
Files that are 15-50MiB (a common size for scanned negatives in camera RAW formats) offer the best balance of speed/quality. On most WiFi connections (150Mbps+), film Q takes about 10 minutes to process a full roll of 36 exposures.
Archiving digital negatives with Dropbox. film Q’s Dropbox integration automatically inverts your archived scans and keeps your files organized.
Old computers or restricted devices. There’s nothing to install — film Q works in a browser. It also does not rely on your system resources, so it can work on underpowered devices.
Accessing and viewing results from several devices. You can add negatives on one computer and download the processed files on another device — and vice versa.
Flat inversion results with great editing flexibility. film Q does not add contrast, sharpness, or colour-correction to your images. Instead, it gives you all the image data that makes up the negative, so you can create your photographs with greater control.
Fixing colour casts on slide film scans and base fog. You can process most slide film scans that appear to have a blue, green, or purple cast automatically using film Q. It will remove the colour casts and improve contrast. You can also fix many “foggy” film scans of black-and-white and colour-negative film using this method.
When other inversion apps don’t work. Film inversion apps use varying combinations of techniques. Your primary inversion tool may be an excellent partner for your flow until an issue arises that needs an alternate approach. film Q can be your backup tool.
Articles on this blog will help you understand exactly how film Q inverts your film negatives so that you can use that knowledge to experiment on your own. Along with access to film Q, your membership includes premium monthly guides/experiments/website features, a member newsletter, and more apps.
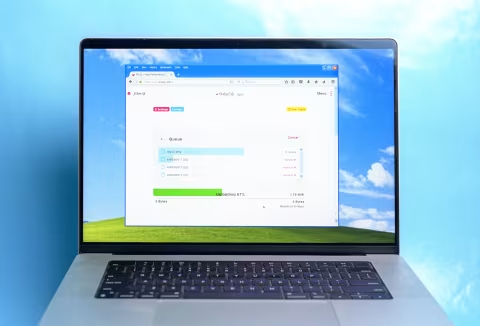
film Q is *not great* for:
Large files and a slow internet connection. film Q can invert files up to 300MiB in size, but if you have hundreds of images like that, your uploads will take a long time.
film Q is not an all-in-one solution. While you can certainly get scans you can share immediately using this app, there will be cases when colour correction is required. You can use any image editor of your choice to do that — this guide explains how, and this section has a list of great free and paid tools for the job.
File formats and sizes.
film Q accepts a wide range of camera RAW formats¹, all types of TIFF files, PNGs, JPEGs, and the mobile-native HEIC format with 10-bit colour support.
You can upload files up to 300 MiB in size and process up to 12 GiB of files per month. GOLD+ memberships include 62 GiB of monthly bandwidth.
Your scans are processed using a 16-bit lossless pipeline into low-compression full 4:4:4 chroma JPEGs, which deliver the highest quality, compatibility, and smallest footprint. 16-bit TIFF file output is also available.
This guide explains when you may prefer a TIFF file (most of the time, JPEG is a better option).
¹ — Please turn off the High Efficiency (HE) or High Efficiency* (HE*) RAW compression if you are using a Nikon Z-series camera. This compression is not currently supported.
How to prepare your film scans.
If you’re scanning with a digital camera, ensure that it is perfectly perpendicular to your film, that no stray light is casting onto the film, and that you’re not clipping the shadows or highlights. Use a remote release cable to ensure there’s no camera shake. Scan into RAW format. This will offer the best image quality and a reasonably compact file size.
If you’re using a dedicated film scanner, scan your film as slides/positives in all neutral settings. This will create digital negatives that you can archive as the primary source for your images. I recommend saving these files as TIFFs and reducing the resolution to save space if needed. You can always rescan or print that one great photo in a darkroom, or rescan it at a higher resolution later.
How to download and manage your inverted files.
If you are using the Dropbox integration, all your files remain in your Dropbox account — you can access them via web, iOS and Android apps, or the desktop Linux/Windows/macOS apps.
Otherwise, click the “Download All” button to get a ZIP archive of all your inverted files, download your files individually, or select several to download at once. You can also click the “View” button to open the inverted file in a new browser window.
How to share files between devices.
You can download your inverted and fixed files on any internet-connected device. Just sign in to your analog.mom account and open film Q. The app will automatically update on all signed-in devices as new files appear.
If you are using the Dropbox integration, your files will be synchronized to your Dropbox account.
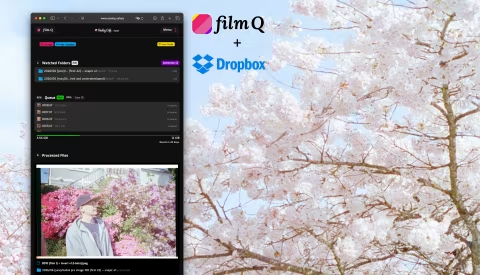
How to use the Dropbox integration to archive your film scans.
film Q’s Dropbox integration can simplify your archival process and streamline inversions. You don’t need a paid Dropbox account, but it helps to have more storage than what the free option offers.
Preserving film scans can be as important as preserving the negatives. When done right, the first scan can be the best scan since time, dust, and other environmental factors can degrade the quality of the thin strips of plastic. Inverting film scans typically destroys image data, compresses files, or stores images in hard-to-edit formats.
To help avoid losing your original, unedited digital negatives (uninverted scans), film Q organizes and stores processed files next to your originals.
To get started, go to film Q > Settings > Switch to Dropbox Storage (or click the blue button next to the Settings to toggle). Then, click the blue “Connect to Dropbox” button and follow the instructions to complete the setup.
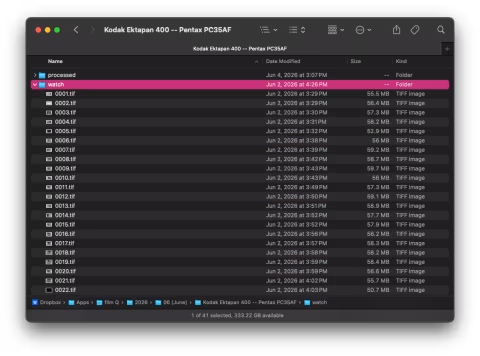
Once you’ve connected film Q to your Dropbox account, you’ll find a folder Dropbox > Apps > film Q. You can use this folder to archive and organize your film scans — I recommend creating individual folders for each year, then month, then film and camera — see this guide for additional info.
Whichever file structure you choose for your scans, simply name a folder with your scanned negatives “watch.” As long as it’s inside your Dropbox > Apps > film Q folder, film Q will automatically recognize it. Once it does, click the green “Invert” button to start processing the files inside the watch folders.
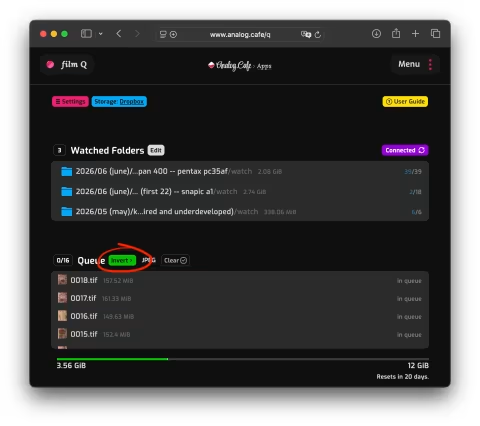
Once running, film Q will automatically create an adjacent folder named “processed,” and place your inverted files there. You now have your archived, untouched digital negatives and inverted files next to them.
You will need to periodically remove Watched Folders in film Q interface (click “Edit” > “Unwatch”) — or simply rename them to something else. There can be a maximum of 20.
To switch to slide/positive fixing mode, click the Settings button.
Getting the hang of the Dropbox integration can take some time, but it can be worth it to ensure the files are well-organized, the originals are untouched, and the files are available on all your devices and Dropbox servers for backup.
How to use the Watch Folders for live instant inversions.
Dropbox integration can also continuously monitor all your Watch Folders. When it does, each time you add a file to a folder named “watch,” film Q will pick it up and process it.
This can be helpful when you want your negatives to invert automatically as soon as they are done scanning — either via a connected film scanner or when tethering to a digital camera scanning rig.
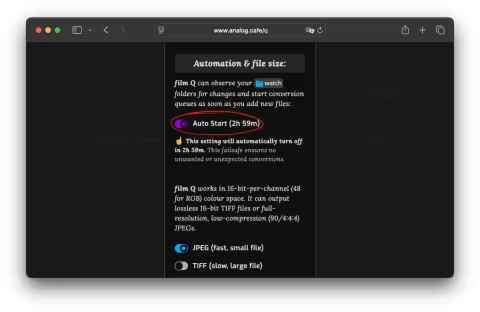
To enable this feature, go to Settings > Auto Start. Once it’s on, whenever new scans are saved inside one of your Watch Folders, they’ll convert automatically and become available in your Dropbox.
With the Auto Start setting on, you can close the film Q page altogether. It will automatically detect and convert files for you in the background.
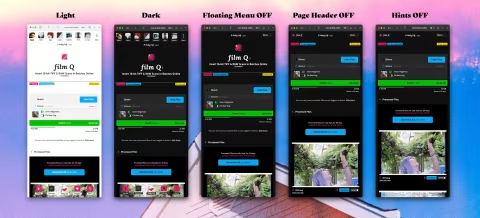
Adjusting view settings.
Colour theme. This website automatically selects a dark or light ☀️colour theme to match your device’s settings. You can also change that via the Menu on the top-right and toggling the “Theme” button.
Floating menu. You can toggle the floating menu navigation (the rows of buttons at the top and bottom that appear when you scroll up). The floating menu can be a convenient way to browse the website, but it can also be distracting when viewing images, especially on smaller screens. To disable it, go to the Menu on the top-right and toggle the “Hide/Show Floating Navigation” button.
Page header. To get even more working room, you can hide the large header at the top of the film Q web app. Click the red Settings button and uncheck the “Show Page Header” toggle. This setting only applies to the film Q page; the rest of analog.mom will continue to show full headers.
Hints. film Q shows several contextual hints near the top of the page. You can hide these as well, for yet more space to work with your images. Click the red Settings button and uncheck the “Show Hints” toggle.
Image previews. film Q renders previews of your inverted images under the “Processed Files” header. They are smaller or more compressed versions of the inverted files, which you can download or access in Dropbox. However, they are large enough (1800-2048px-wide) for you to examine in detail and zoom in on. You can also rotate them via the contextual menu (click the image to open it or via double-click). Rotating previews does not actually rotate your inverted files.
Enabling TIFF output.
If you’re using the Dropbox integration, you can enable TIFF file output in Settings.
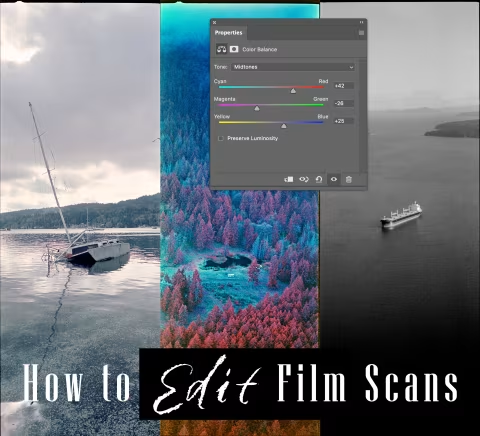
How to colour-correct your film scans.
film Q uses histogram stretching — a simple technique for inverting film negatives to create flat positives. Flat positives capture the full contrast range of the negatives, offering a lot of flexibility for editing.
Certain film-and-scanner combinations, light, and lens filter combinations may require colour balance adjustments. You may also like to edit the contrast and saturation to give your film more life while retaining a natural look.
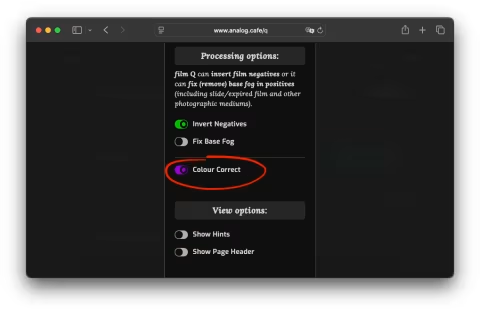
film Q’s built-in colour correction algorithm works similarly to the greyscale reference mask method described below, by calculating the mean of the colour distribution in an image and nudging it towards grey. It accounts for highly saturated colours and colour anomalies to avoid overcorrections.
You can turn off the built-in colour correction to take over the process, or you can take advantage of those corrections by improving them further in your favourite image editor:
“How to Edit Film Scans” explains how you can utilize virtually any advanced image editor to colour-correct your white balance using a greyscale reference mask, change hue and saturation, and fine-tune your contrast and exposure.
Virtually all photos posted on this website after February 2021 were processed using a version of film Q’s histogram stretching implementation and further edits done in Adobe Photoshop.
You can use any image editor that lets you adjust colour balance, RGB curves, and saturation, draw shapes, add layers, and apply greyscale filters. Some examples of such apps (aside from Photoshop) are Affinity Photo (free), Gimp (free), and Photopea (free, web-based).
How to automatically fix expired print and slide scans.
Both new and expired slide film scans can render a colour cast which was never intended by the manufacturer. It is often the result of impurities in the transparent portions of the film, colour shifts within the emulsion, or issues with the scanner lamp or exposure. Scans of old prints and Polaroid frame scans can have similar issues.
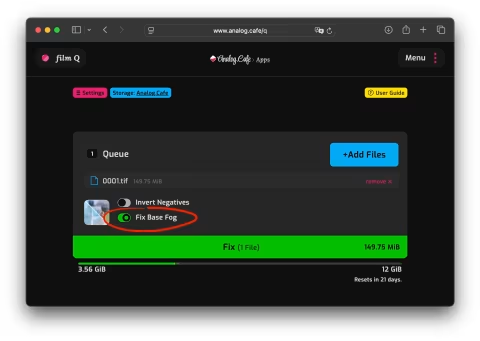
In many cases, film Q can automatically remove the colour cast and improve the contrast of your slide film and print scans. The option to do that is called “Fix Base Fog.”
“Fix Base Fog” analyzes your images and performs histogram stretching, but does not invert the colours.
You can even try this option on scans made in other software if you find they lack contrast or have a colour cast. However, there are many different colour casts and contrast issues that images can have, some of which cannot be helped using this method alone.
How to install the analog.mom web app.
iOS Safari, Google Chrome (Android, PC, Mac), and other browsers let you install web apps like analog.mom so that you can find them on your desktop or home screen and launch with fewer distractions.
To install analog.mom, tap on the share button at the bottom and select “Add to Home Screen” on iOS. On Android, you’ll need to tap the three dots next to the URL bar (the same if you’re using Google Chrome).
You can then launch film Q from the analog.mom homepage to get immediate access to your inverted photos.
Please note that you’ll still need internet access to use film Q.
Troubleshooting.
There can be a rare situation when film Q renders an unnaturally high contrast. For example, if you photograph a piece of blue sky without any clouds, the histogram stretching detector will incorrectly determine that all of the colours that are available in the image are just blue. This is a known drawback of this method. Your workaround is to manually invert another frame on the roll and copy the histogram adjustments to the offending frame (see the link above for instructions on how to invert film manually).
Inconsistent colours between frames. Less than 0.1% of scans may have colour issues due to scanner incompatibility or scanning issues. Please ensure that you scan your film consistently (no auto correction settings on your camera or scanner), try to invert the film manually, or contact me if you need further help.
Errors or black frames. Some image formats are not supported by film Q, which can cause errors or produce entirely black images. I am continuously adding support to new formats — please contact me and be ready to send me a sample so that I can find a solution for you. Meanwhile, please try to invert the film manually.
Out of bandwidth. If you run out of your monthly bandwidth, film Q will pause conversions until it resets on the first of the month. If you can’t wait that long, contact me, and I may be able to help you with that.
App errors. film Q is a complex platform comprising several services and a network of cloud computers. It’s been thoroughly tested and continues to receive regular updates. However, like all software, it will occasionally throw an error. You can try reloading the page or clicking the purple “Connected” button if you’re using a Dropbox extension. If the issue persists, please contact me, and I will do my best to resolve it ASAP.
Future updates.
film Q has been in development since 2021. It receives regular updates as well as occasional big new features, such as the drag-and-drop inversion and secure storage improvements.
You can track all the major updates here.
Contact.
Please find my contact information here.
I can’t promise to implement all the requested fixes or features, but I will consider every single one and continue building film Q to be the simplest and most powerful film inversion tool possible.
