Lucky C400 Colour-Negative Film Review
Read This to Avoid Immense Disappointment
14 min read by Dmitri.Published on . Updated on .

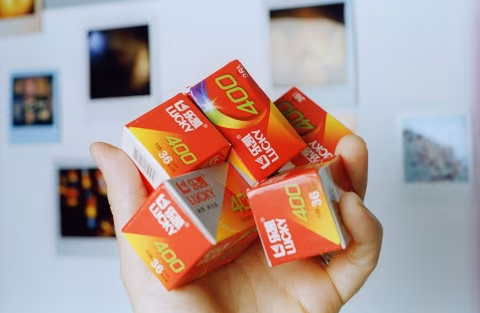
Lucky C400 is a highly anticipated follow-up to the successful launch of China’s first colour-negative film in over a decade, Lucky C200.
This film made it to the scene exceptionally fast. Pre-production samples of this film surfaced on 抖音 Douyin just a few months ago, which was exactly a year after the launch of Lucky C200. Rumours suggest that slide film will be next.
It took about a decade for InovisCoat, a German film factory that makes film for Lomography and others, to refine its colour-negative film into something that gets consistently good reviews. Many more projects have fallen through since. But Lucky did it in just one year.
However, this film is neither what it promised to be nor what many would have expected.
I’ve shot several rolls of this film over the course of two months. I developed it normally in C-41, stand-developed, and even tried it in ECN-2. I gave it many opportunities to impress me and got some good results — but I will not sugarcoat the fact that this film feels like an unfinished product.
In this review: The colours — C-41 & C-41 stand. The colours — ECN-2. The colours — ECN-2 + cooling lens filter. Comparing corrective lens filter options for Lucky C400. What’s wrong with Lucky C400? A test run? Grain, resolution, other issues. Contrast and dynamic range. How much does this film cost? Is Lucky C400 worth the trouble? Where to buy. Support this blog & get premium features with GOLD memberships!
✪ Note: This review tests some of the first Lucky C400 film rolls to become available for sale outside China. On the box, they are marked as Emul. No. 12T42600002 with an expiry date of 2028/07, which implies they may have been manufactured around July 2026. There’s also the Quality Standard Q/GF 10-2026, and instructions for DAYLIGHT USE, ISO 400/27°.
The colours — C-41 & C-41 stand.
All colour-negative films require some sort of colour balancing or interpretation. In a darkroom, various colour filters need to be tested for virtually every printed frame. Your film scanner, even if it’s set to all-neutral, will pass the data to inversion software that performs automatic colour correction.
It’s possible to take control over the inversion process by either doing it manually or using tools like film Q. With that workflow, the inverted positives are unedited drafts that often need further colour correction, similar to how the process works in a darkroom. This is how I’ve been scanning my film for the past five years.
Colour correction is usually not that difficult. I like understanding how it works and how I can apply it in a manner that’s truthful to the film stock, the actual colours of the scene being photographed, and my taste. But that is not the case with Lucky C400.
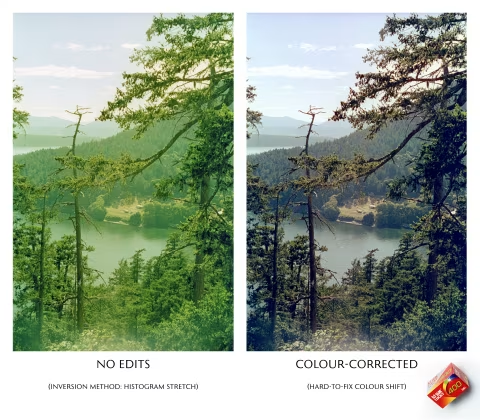
Every single frame of this film came out looking piss-green by default. This is not my technique or hardware faltering: many early reviews of this film show the same orange, yellow, and green casts.
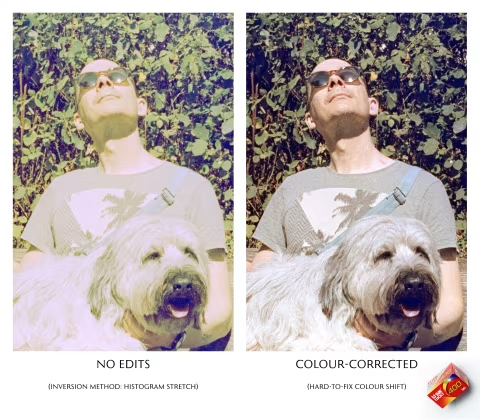
Yes, the casts can be corrected, but that’s not always easy, as many of the same early reviews have evidenced. It took me some time to develop a new technique specifically for colour-correcting the Lucky C400 scans.
This is not normal. No other film has given me this much trouble, not even the Harman Phoenix, which the company have paired with special instructions for the film lab scanners.
None of the early test reviews mentioned this. Lucky C200 did not have this problem.
Needless to say, I felt quite disappointed after my first experience with this film. But I’ve got five rolls of this stuff for a reason, so I decided to put them through various tests and see what I can get.

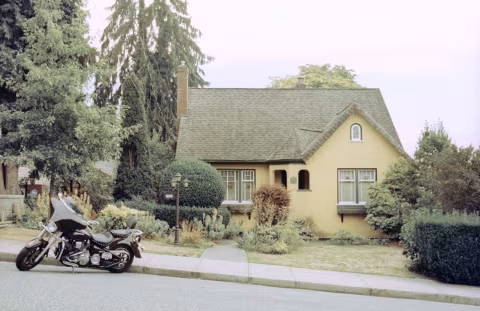
C-41 — normal development. After considerable effort spent colour-correcting each frame, Lucky C400 can reveal some potential. It won’t be as good at depicting skin tones as the best stuff from Kodak or the lonely Superia Premium — the only ISO 400 film still manufactured by Fujifilm in Japan.
I like the results from C400 better than the German-made films of the same type (ORWO NC500, plus the Lomochrome colour films). The Chinese film has better colour separation; it’s more vivid and less grainy.
Things like colour separation and grain size can’t be easily edited in or out of digital scans; still, work has to be done to get Lucky C400 to look its best. (Other films may need colour correction too — but not as much).
C-41 stand. One of the hardest issues to fix on Lucky C400 scans is the stark blue noise in the shadows. It can manifest in midtones too, whereas the rest of the image would lean heavily towards green and red; removing the blue noise via colour balance tools makes the rest of the image worse. The colour-correction technique I mentioned above can fix that, but with stand development this appears to be less of an issue.
Stand development is a technique typically applied to black-and-white film. It involves leaving film in a weak developer solution for an hour without agitation. The results often produce lower-contrast images, which can be helpful for films that have no development recipe, long-expired films, or simply because you’d rather take a break while the photos are brewing.
For C-41, a process that involves heating up several chemicals to a precise temperature, stand development may seem like an oxymoron — but it is possible. I used the full concentration for my developer and bleach, with the timings provided by the Chem Log app (which calculates them based on chemical reuse), followed by five minutes in a fixer with standard agitation.
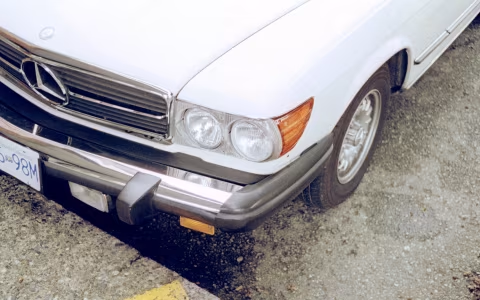
C-41 stand development tends to reduce saturation, so I wanted to see whether altering the process pace would make a difference with this film. It appears that it may have.
This is not a one-to-one comparison; however, I replicated the deep, dark shadows in my images — the ones that were causing issues via stark blue noise — and they appeared to be less of a problem. Colour-correcting Lucky C400 after stand development in C-41 seems to be much easier.
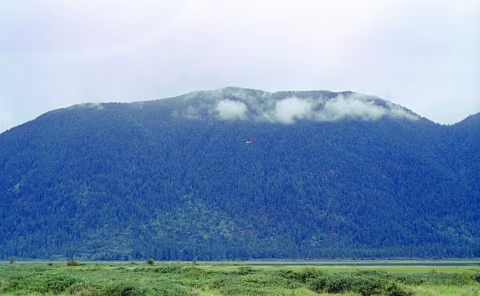
The colours — ECN-2.
ECN-2 is an alternative process for colour-negative film, designed for motion picture films, such as the Kodak Vision 3 stocks. It can be used to develop typical C-41 films, such as Lucky C400, often with slight colour shifts.
Cross-processing Lucky C400 in motion picture chemicals did not fix the blue cast in the shadows — if anything, it may have made it worse — but the overall palette became easier to work with: as long as there are no deep shadows, there are fewer colour shifts to correct.
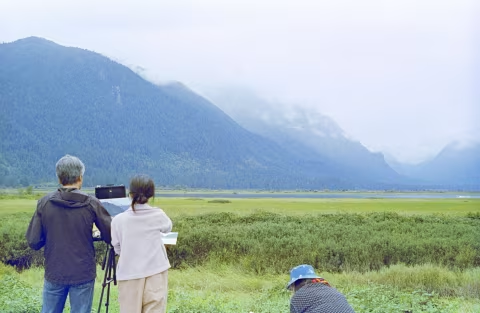
My first set of Lucky C400 with ECN-2 was shot during an overcast day. Despite the flat, cool lighting, it rendered vivid colours, which was nice to see. I still had to colour-correct each frame, but the results felt different and interesting.
The film still seemed hard to control, as some shots still failed, whereas slight changes in exposure could yield significantly different colours. The frames that turned out looked a little more vivid than what I’d expect from most colour films, which I liked, but they were still realistic (I was paying particular attention to the skin tone reproduction).

Seeing how things have improved slightly, I decided to keep processing in ECN-2. I also decided to try some colour filters with this film to see if that could resolve some of the scanning difficulties.
Given that this film comes out looking warmer than it needs to be (i.e., the orange/green cast), I wanted to try a blue (cooling) filter in hopes that it would cut those colours and, hopefully, improve the blue noise in the shadows as well. (It may seem that adding a blue filter would make the blue noise worse, but because that noise can’t be any more blue, it should actually remain unchanged while the rest of the image takes a cooler tone; thus, when the whole frame is colour-corrected, the blue noise should stand out less.)
The colours — ECN-2 + cooling lens filter.
A cooling lens filter (82C) solves virtually all issues with this film. The green cast is either completely gone or minimal, and the blue noise is less of a problem or non-existent.
Isn’t that crazy?

The difference this film produces with and without a lens filter is rather dramatic. It works exactly as expected: no hard-to-correct colour casts, no blue noise. The images no longer look deep-fried, and there’s no need to sacrifice contrast and fidelity with extensive colour corrections.
How could this be?
